|
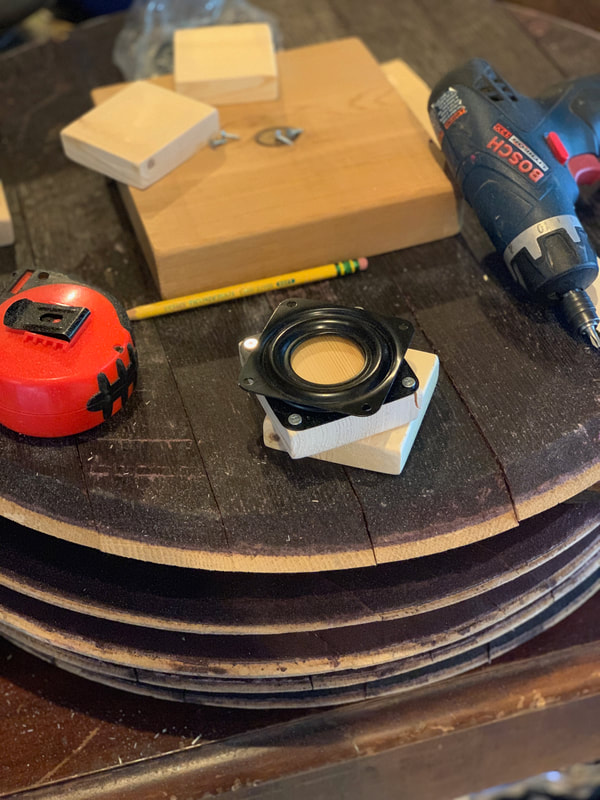
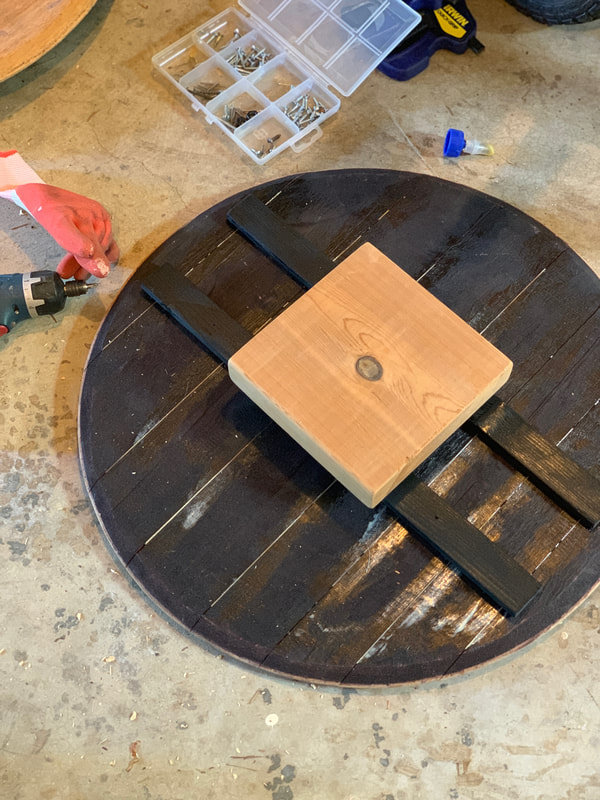
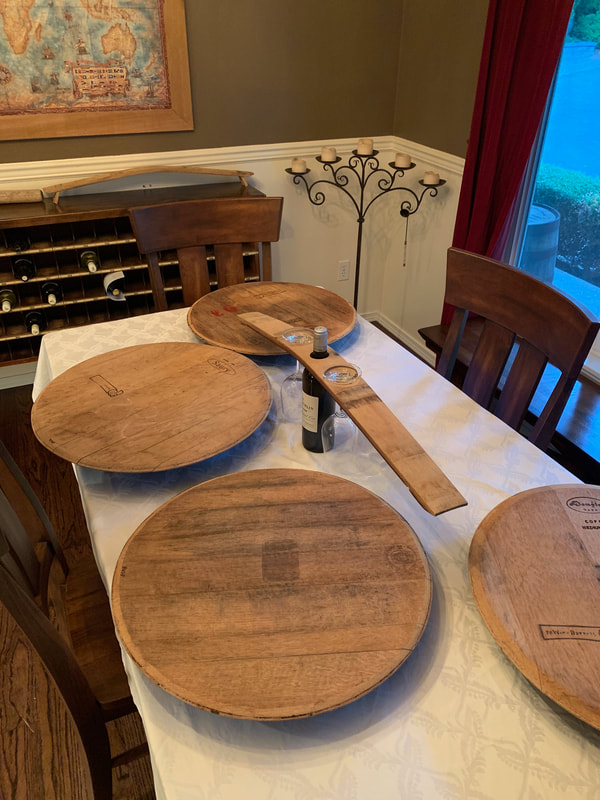
I've never met a wine/ whiskey barrel I didn't like. Regardless of size or the amount of filth, I cannot refuse their rustic, yet functional charm. I think it's the combination of many things I hold dear: old wood, old metal, wine and whiskey. They even smell good. My sister volunteers at a maker space and they had barrel materials taking up valuable square footage for years. I squealed with joy when she delivered them to me. 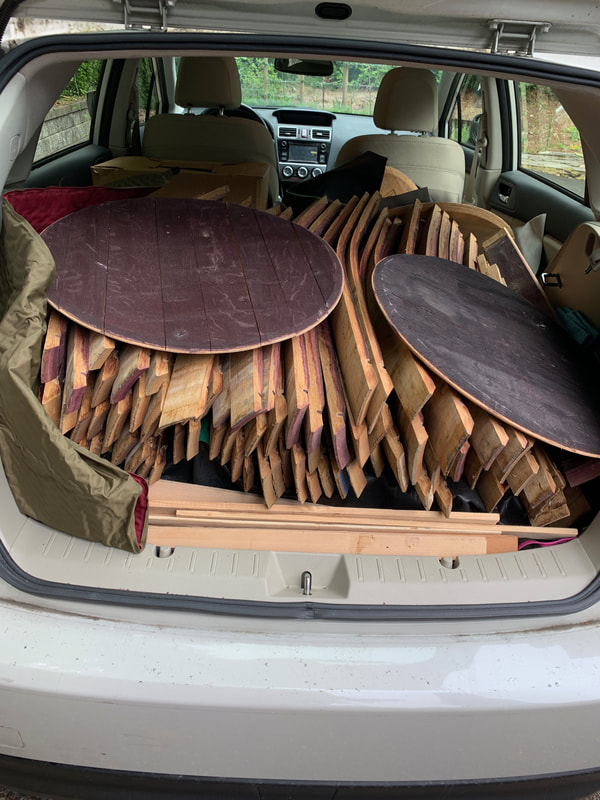 After researching projects that others have done with the materials, and knowing my own limits when it comes to building furniture (I can't), I opted to make some Lazy Susans. I'd like to take a moment to point out how "Susan" seems to take a lot of garbage from pop culture in the past. From "Run Around Suzie" to "Lazy Susans" to "Black Eyed Susans" it's just alarming. I've taken to calling these things by new names.
Ok, rant over. I noticed that the lids I had were falling apart, so I used Titebond II wood glue between every wood slat. Then I cut some small runners to hide underneath the Lazy Larry (cough), securing the slats, going the opposite direction. I bought a steel swivel turntable online and attached it to a second piece of wood I used as a base, and the barrel lid. My main concerns were, 1. will the lid stay together? and 2. will the Lazy Larry have a low enough center of gravity to prevent tipping? The end results turned out pretty well. They certainly look amazing. I gave them to several friends with the caveat that they're inherently tippy and I'm sorry. No one seemed to mind.
0 Comments
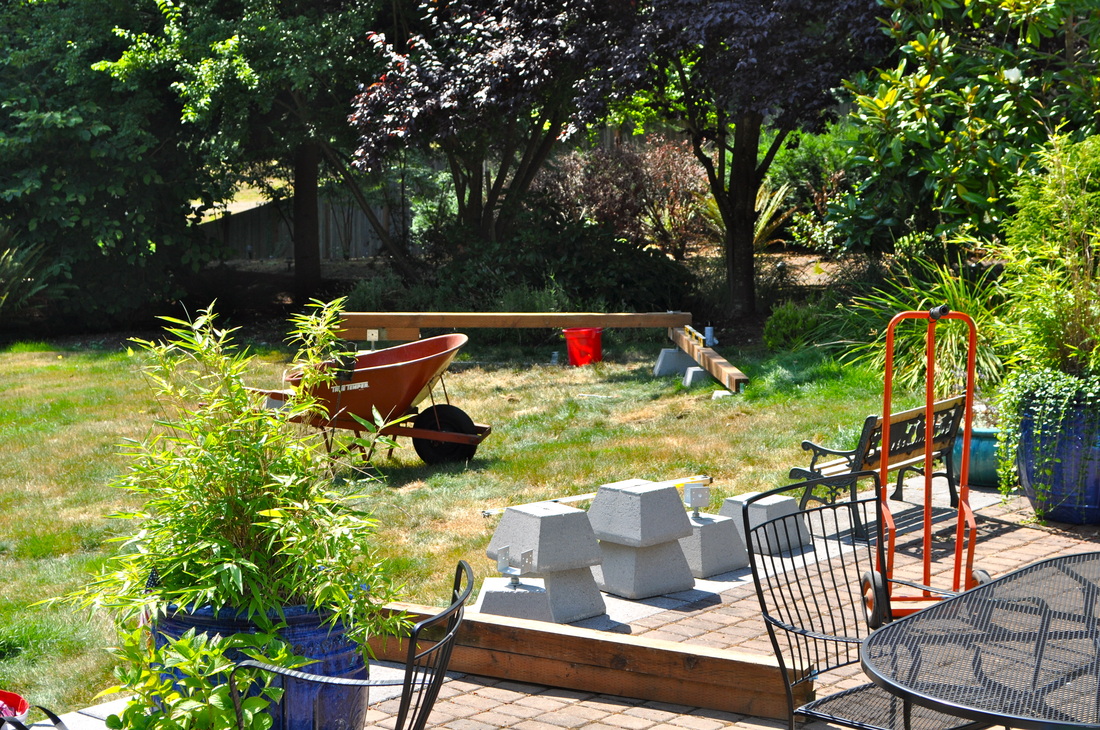
Laying in the sun, regardless of the temperature is a great feeling. After pressure washing the deck this summer and before a family party, it was apparent we needed a lot of seating that looked good in a short amount of time with little budget. I selected a bench I though I could make with my dad and printed the instructions from Pinterest. Having learned from building the playhouse, even the best plans have flaws. My dad builds according to the instructions and I'm a creative problem solver, so together, I thought we could pull it off. Except, I didn't want one bench, I wanted TWO : ) I ordered all the materials from Dunn Lumber so I didn't waste time in a huge home improvement store and end up with poor quality lumber, plus, I had the benefit of a sales guy who walked me through some of the hardware required. I'm so happy with how they turned out. They are super beefy and very comfortable, thanks to all the pillows. Downsides are that they are also very heavy, so I have to call for back-up if I need them moved and since they're made of wood, I might move them into the garage for the winter. 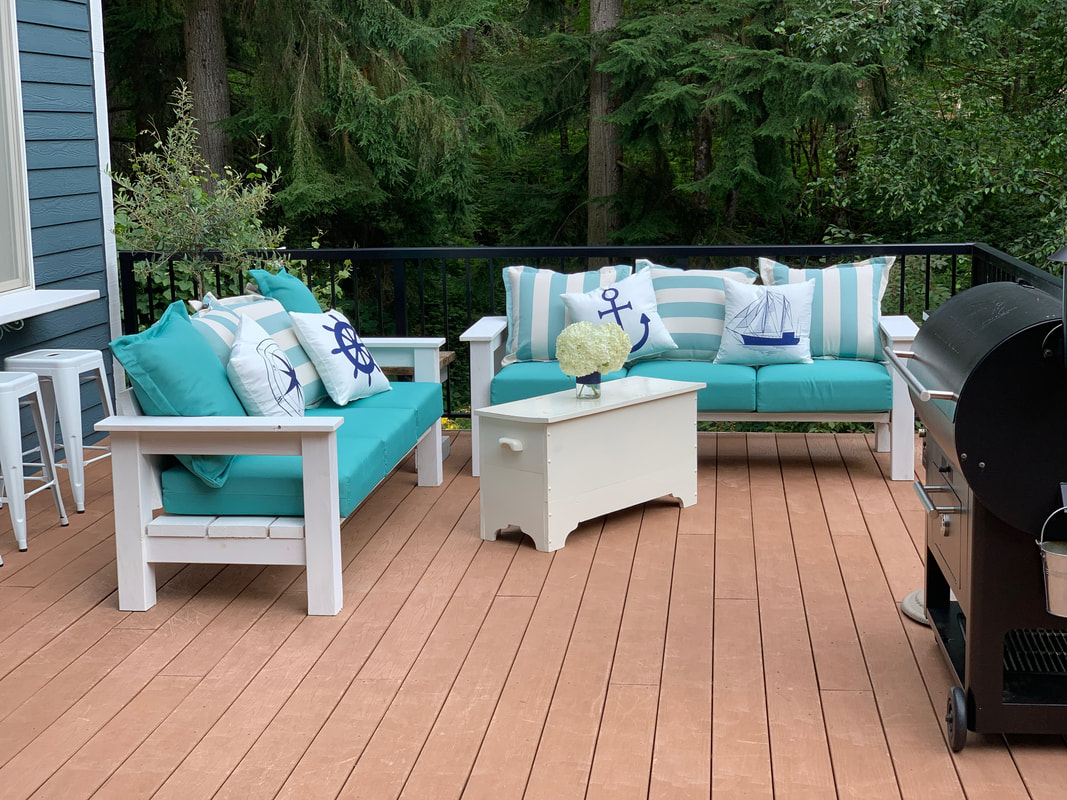 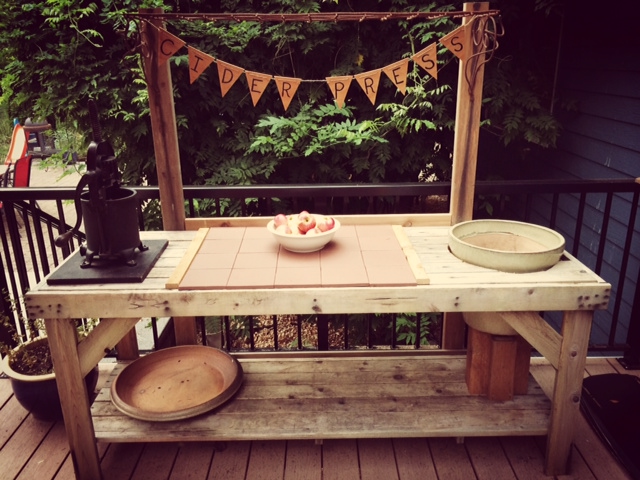 Last fall, we took a weekend getaway to Lake Chelan in Eastern Washington. We pressed apples to make the most delicious apple cider in the entire world. Read about it here.
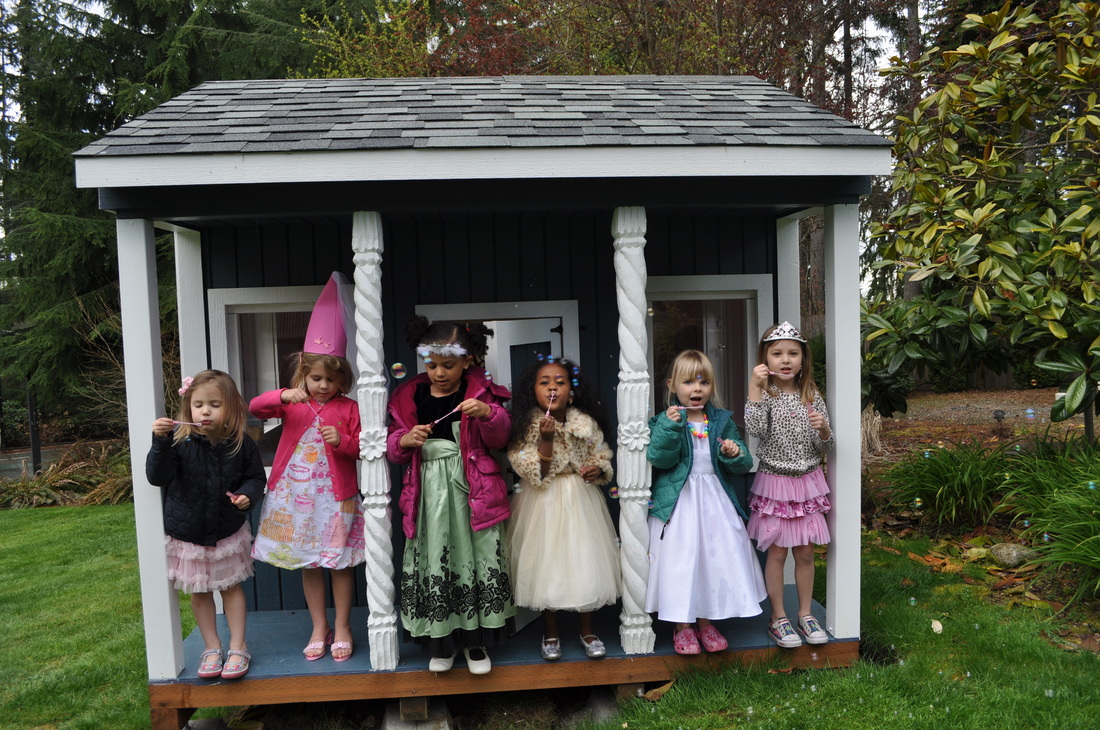
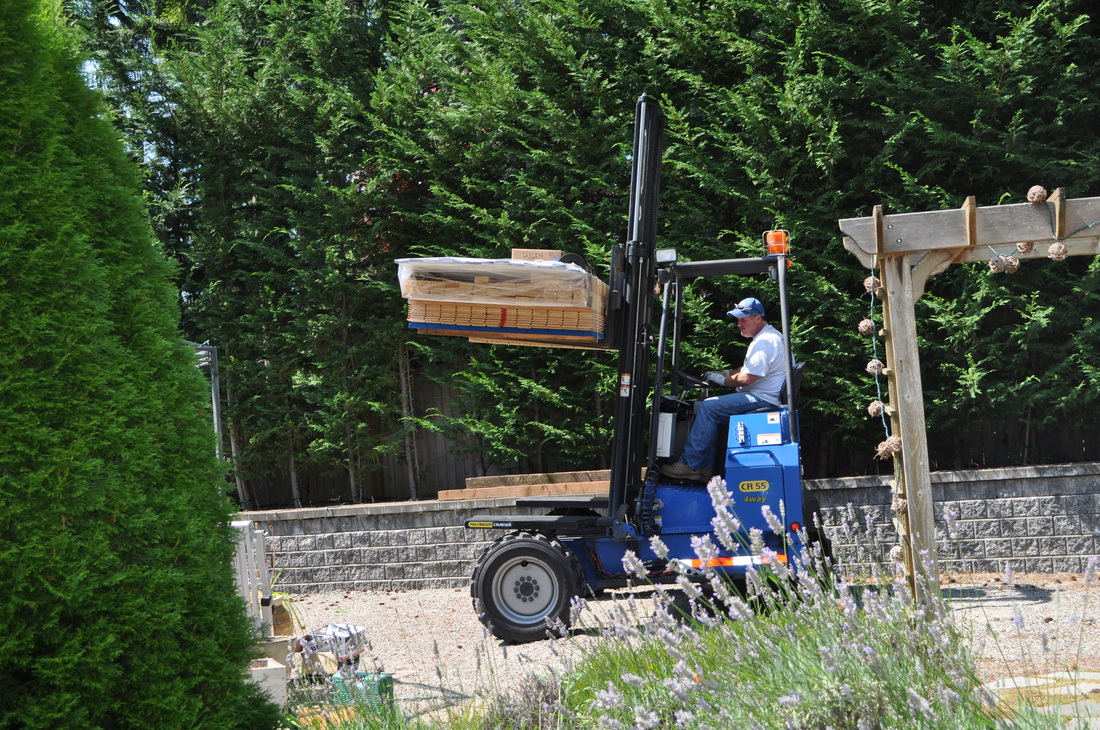
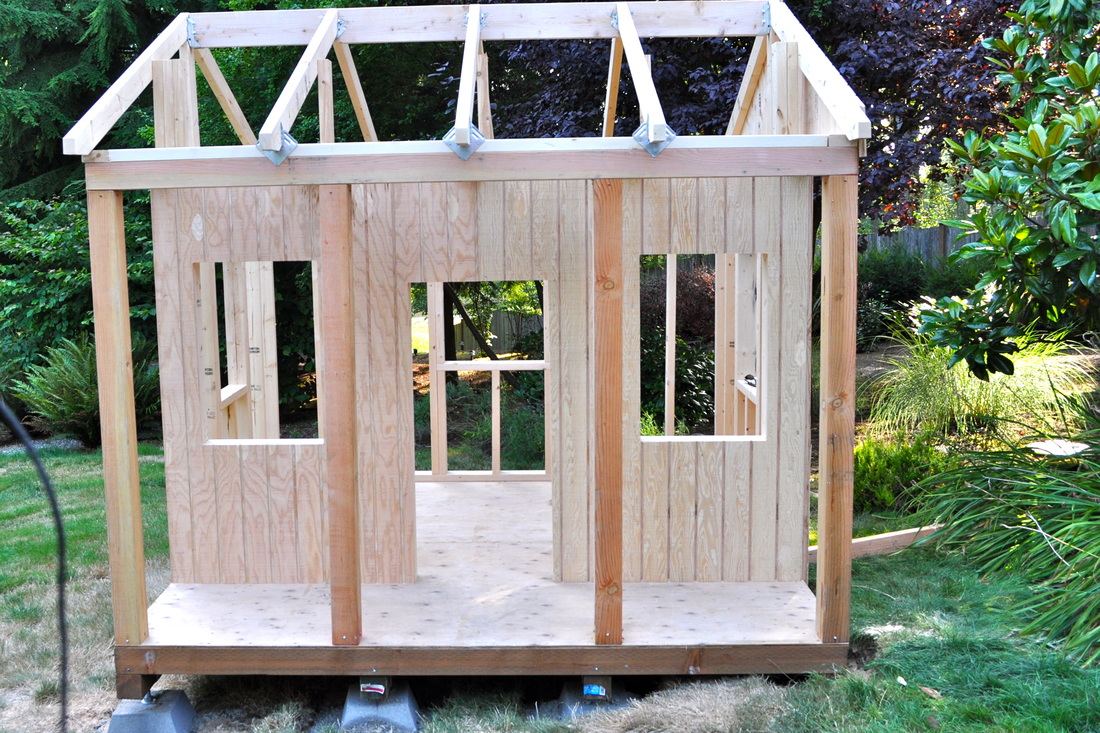
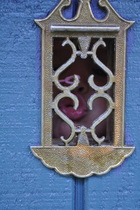
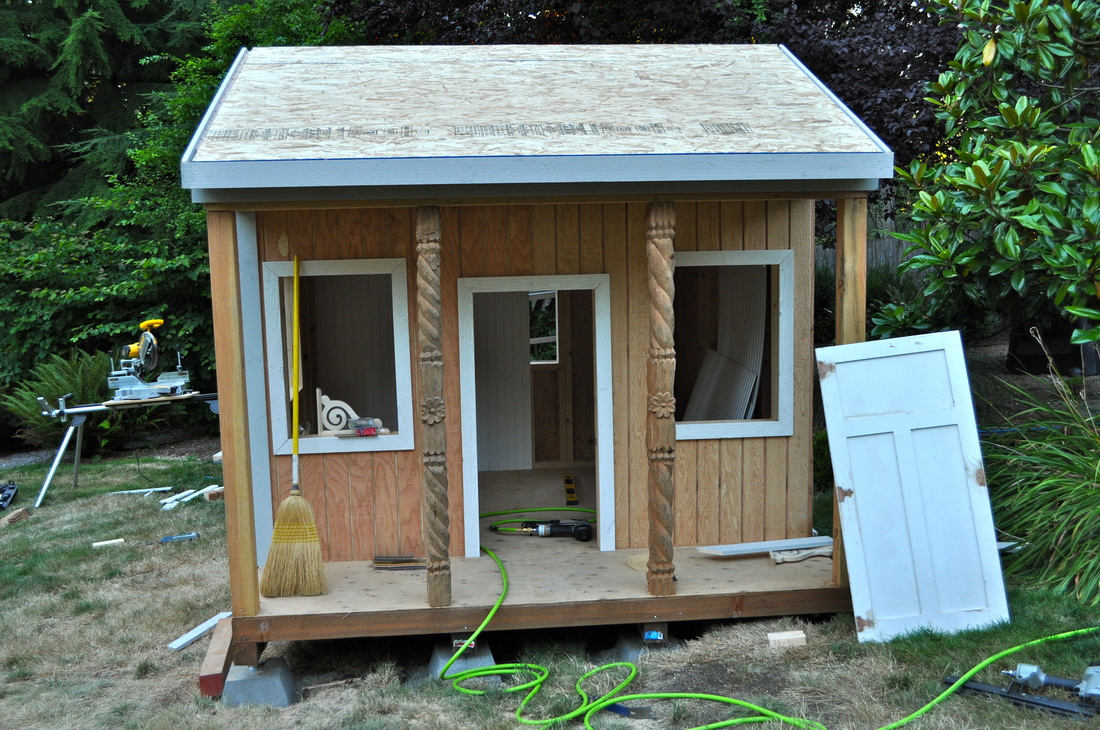
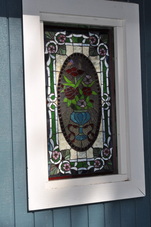
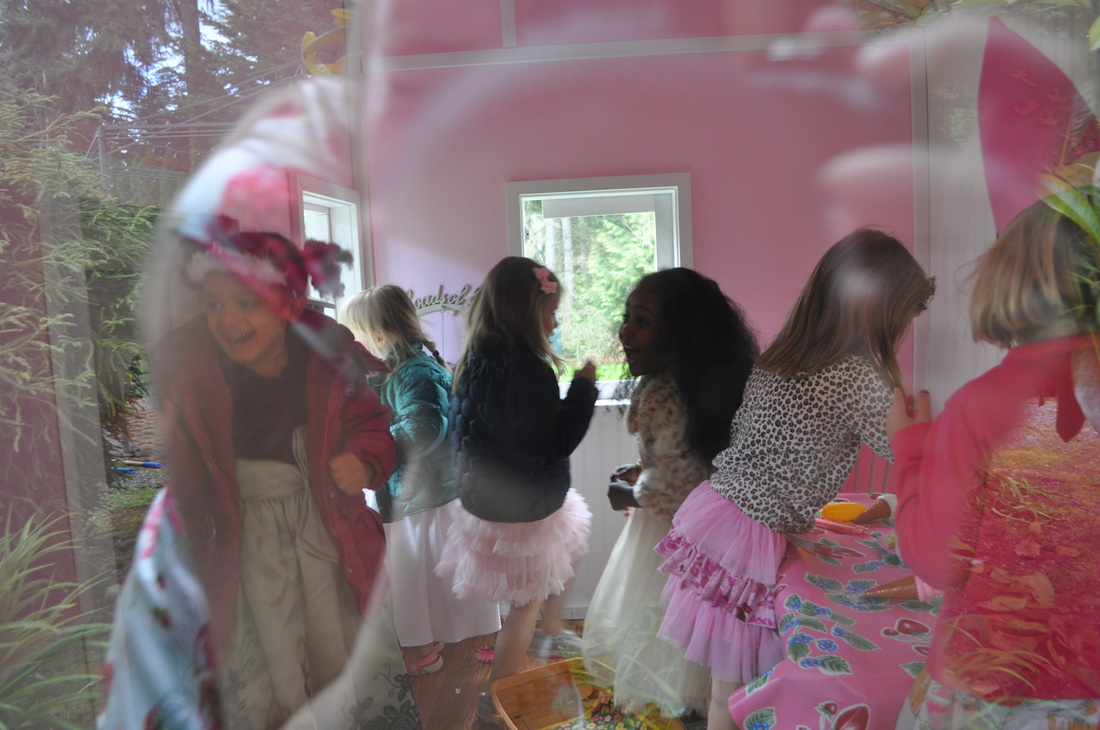
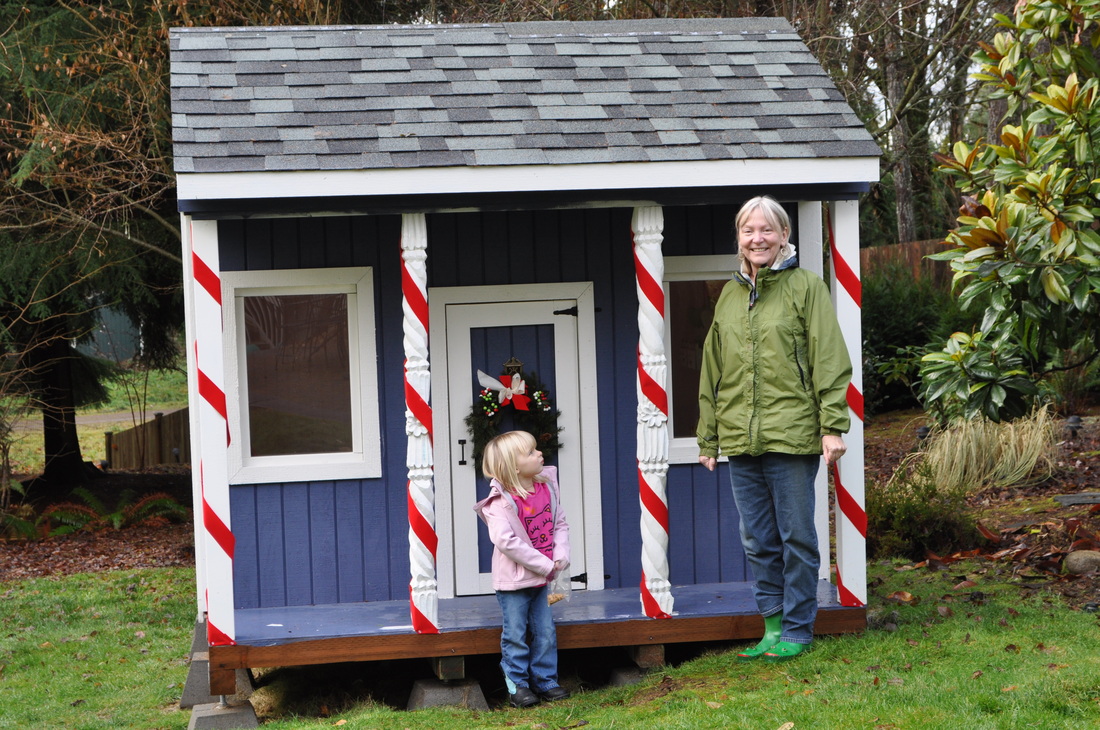
I was inspired to find a way to share that experience with our friends and family. My husband found an antique cider press on Ebay, but since the parts for the ancient cider presses are hard to find and expensive, we ended up with one and a half presses. Hopefully, we'll be able to cobble enough pieces together to make both work. When you press apples to make cider, there is a process. Wash the apples, chop them into quarters and press them. I wanted to make a work table that would allow us to do all three of these things systematically. I happened to have an "extra" workbench laying around (thanks dad!) I somewhat unskillfully used a skillsaw to cut a flowerpot-sized hole. I placed two pressure-treated 4x4 scraps and two pressure treated 2x6 scraps under the cleaned flower pot to make the "sink." The pot has a hole in it, with a hose fragment the drains away from our work space. I'll use a garden hose and sprayer to act as our faucet. To the left of the sink is a little tile area for cutting the apples. I didn't secure them to the work table, just nailed a couple 1x2 trim pieces down to keep them square. On the left side of the table, we can put our press. The press is made of cast iron, so we store it indoors and carry it outside to use it. The bottom shelf can hold cut apples, or juice containers during the cider press party. I made the little, wooden flags just for fun. 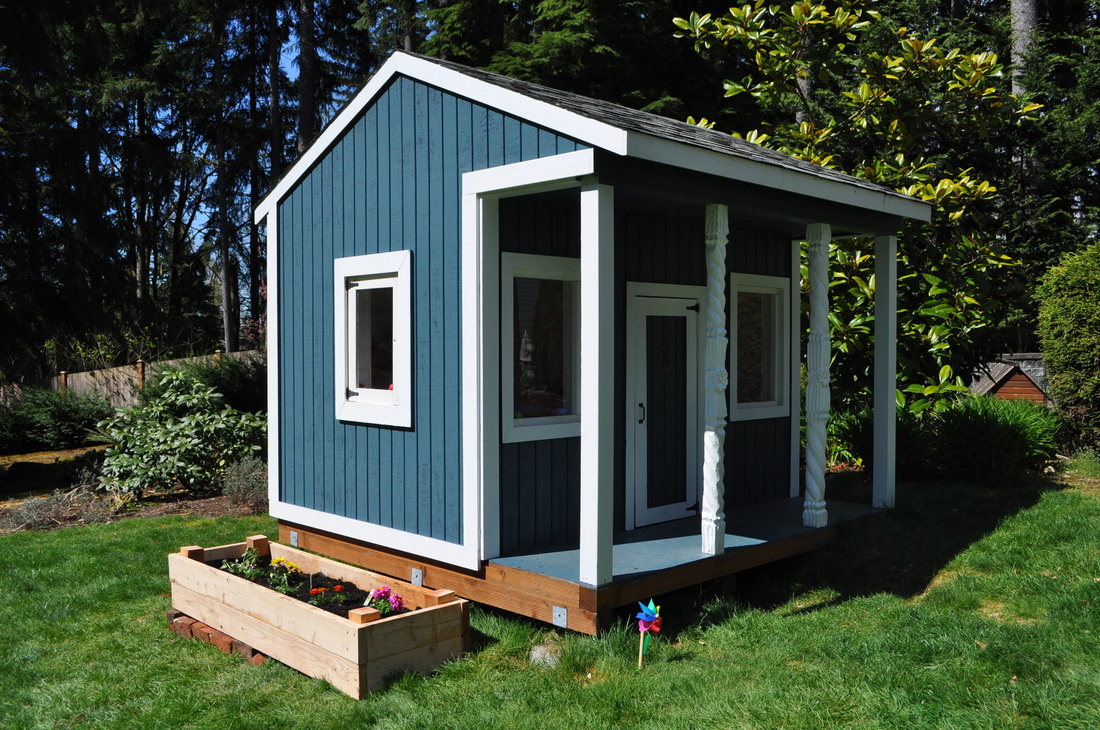 Kids are drawn to this playhouse and can spend hours inside at the kid-sized kitchen "making dinner." They love peeking through the windows and hiding in a space just their size. I can see the playhouse from my kitchen window. For me, it's the ultimate yard ornament and it makes me happy every day. The plans for this playhouse cost $15 on the internet. They were mostly complete, but missed a few key points that we had to compensate for. I suppose that's pretty standard. Before we even started building, we took a trip to Earthwise Salvage in Seattle to find a few things that would give the otherwise basic house, some character. We ended up with incredible, hand-carved pillars, the antique peep-hole and the stained-glass window.
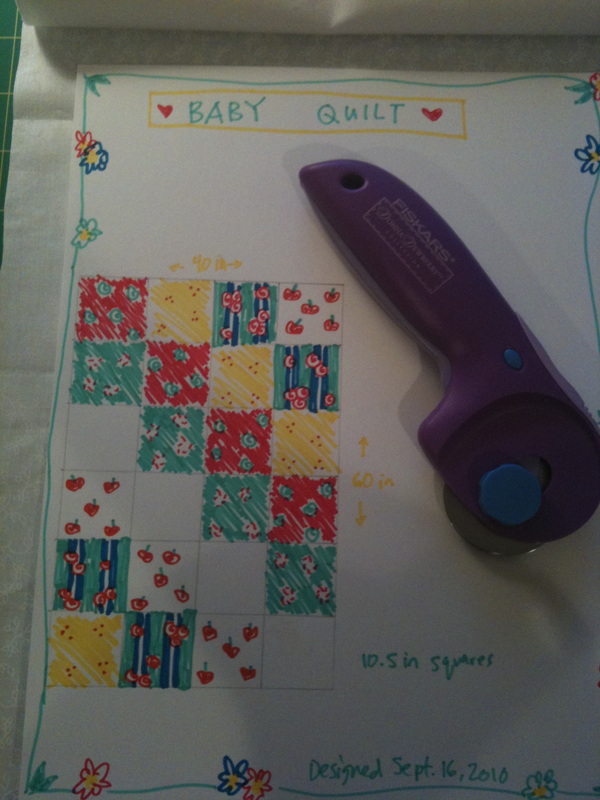
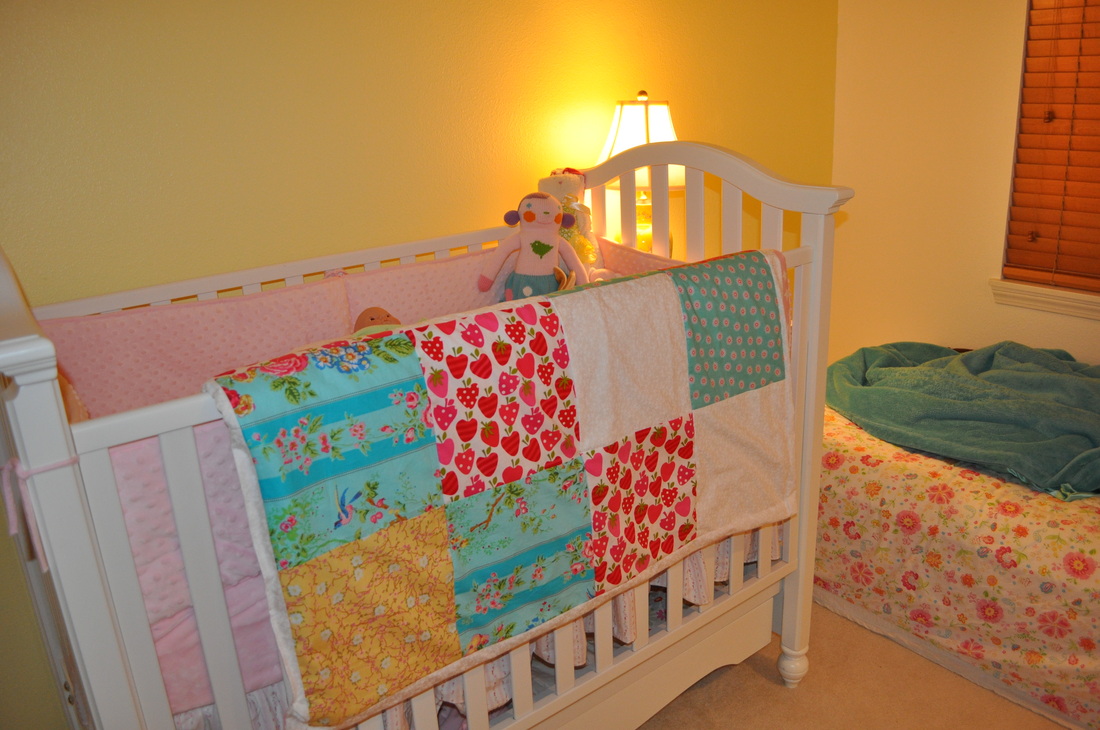
 Play-time! I'm a lazy quilter. I use the most simple pattern I can get away with, I try to use fabric I have collected and I don't want to spend much time behind the sewing machine. In the 8th month of my last pregnancy, I was as focused as only a nesting mother can be, on making a baby quilt. Unlike my past lazy quilts with wonky stitching, this quilt turned out perfectly. The corners matched up! The fabric was all chosen for a specific reason and I love how bright and cheery it turned out. As I say when I'm gardening, I'm more surprised when something turns out well, than when it doesn't; and I'm an optimist!
On a whim, I decided to crossstitch a couple pillows. Relying on faded memories of my mom's 80's crossstitch projects, which included "Home Sweet Home" with some hearts and ducks, I headed to Jo-Ann Fabrics. Without knowing what I was looking for, I found everything I needed and hoped I wouldn't have to make a second trip. Having recently made some throw-pillow slip covers, I decided that making crossstitch slip-covers for throw pillows would be the most practical, because who doesn't love a pillow? and aren't slip-covers handy? I just got to work. I didn't really plan anything or use a pattern. I made lots of mistakes. I didn't check to see how each letter should be stitched. I didn't follow the heart pattern consistently. I had to use an iron edge fuse (thingie) so the cloth didn't fray. That said, I ended up using lots of the iron-fuse, so the pillows are practically bullet proof.
I ironed the heck out of the wedding pillow, but the ring indentation wouldn't come out. It probably would in the wash, but (against the directions) I didn't wash them. I will definitely be doing more cross-stitching because there are so many avenues for it now!
I love black and white photos, especially of the characters in my family. When I had kids, it became even more important to have a space that grounded our family and helps us talk about where we're from and what that means to us. I chose to use black frames over black and white photos, to let the subjects tell the story. We have some interesting lineage including an Irish ship builder that worked on the Titanic and a Todd Shipyard union leader and WWII vet.  As you can see, I lined the frames up on the floor first and moved them around until they felt balanced.
I'm finished with the photos I have for now, but I'll be adding to my collection, as family and life is a work in progress.
Instructions and photos detailing the following projects are coming soon.
|
DIYI make stuff and put it in my house, on my kids or out in the garden. Here are some of my projects. Archives
August 2019
Categories
All
|


 RSS Feed